
Fun with Photos
Step by Step instructions
Read and follow below OR
Click the Box to the Right for step by step video (new 1/5/25)

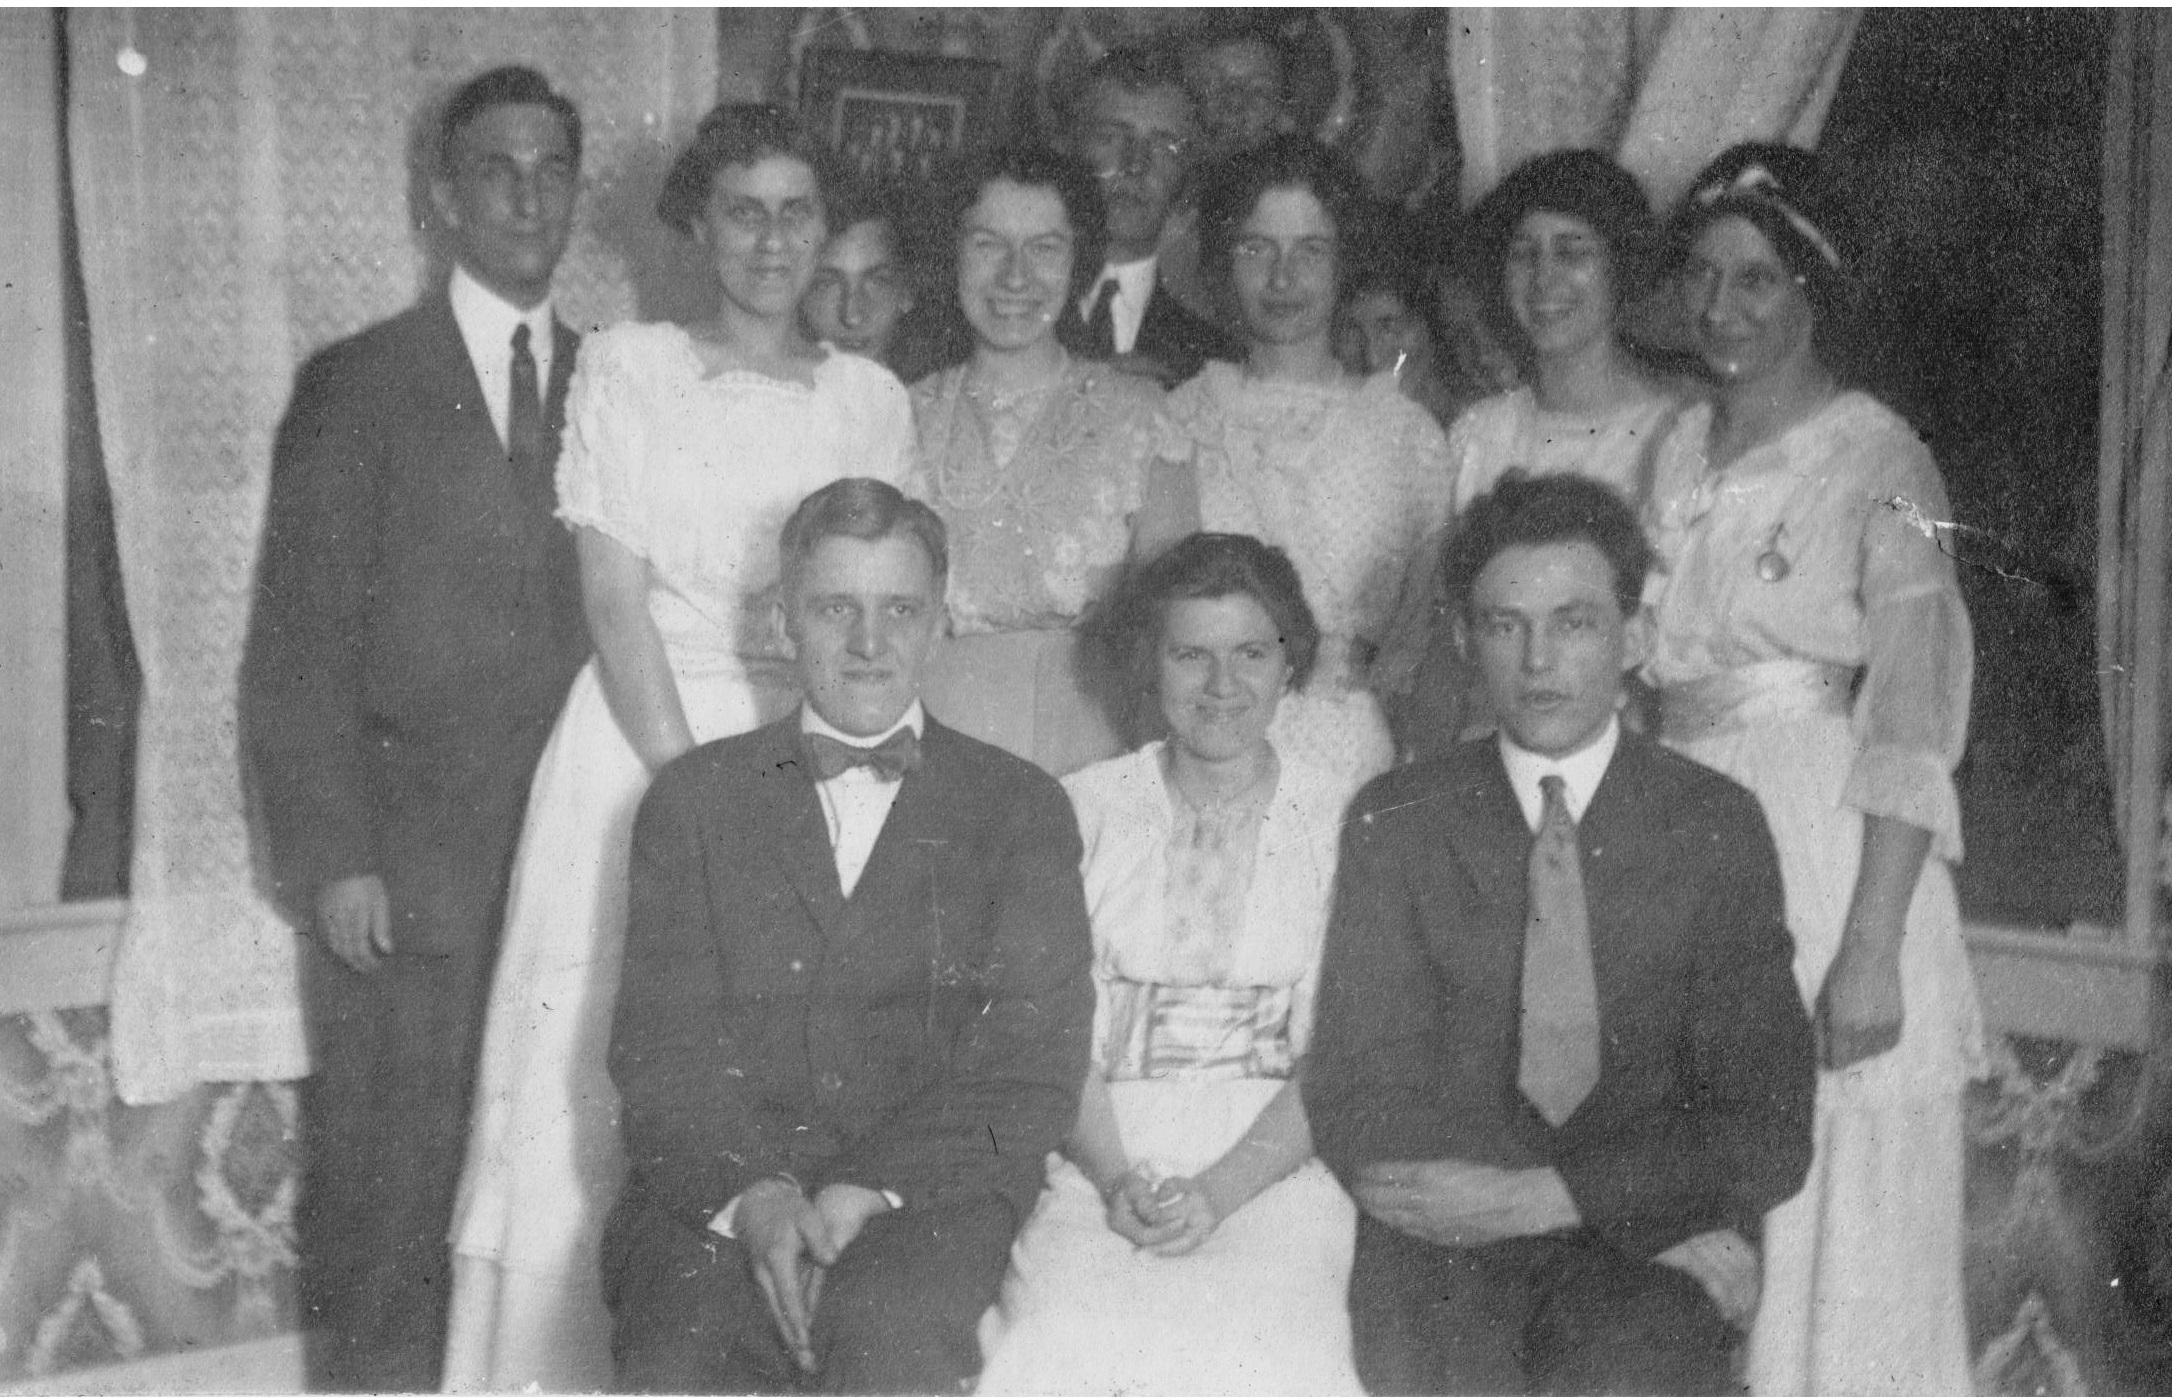
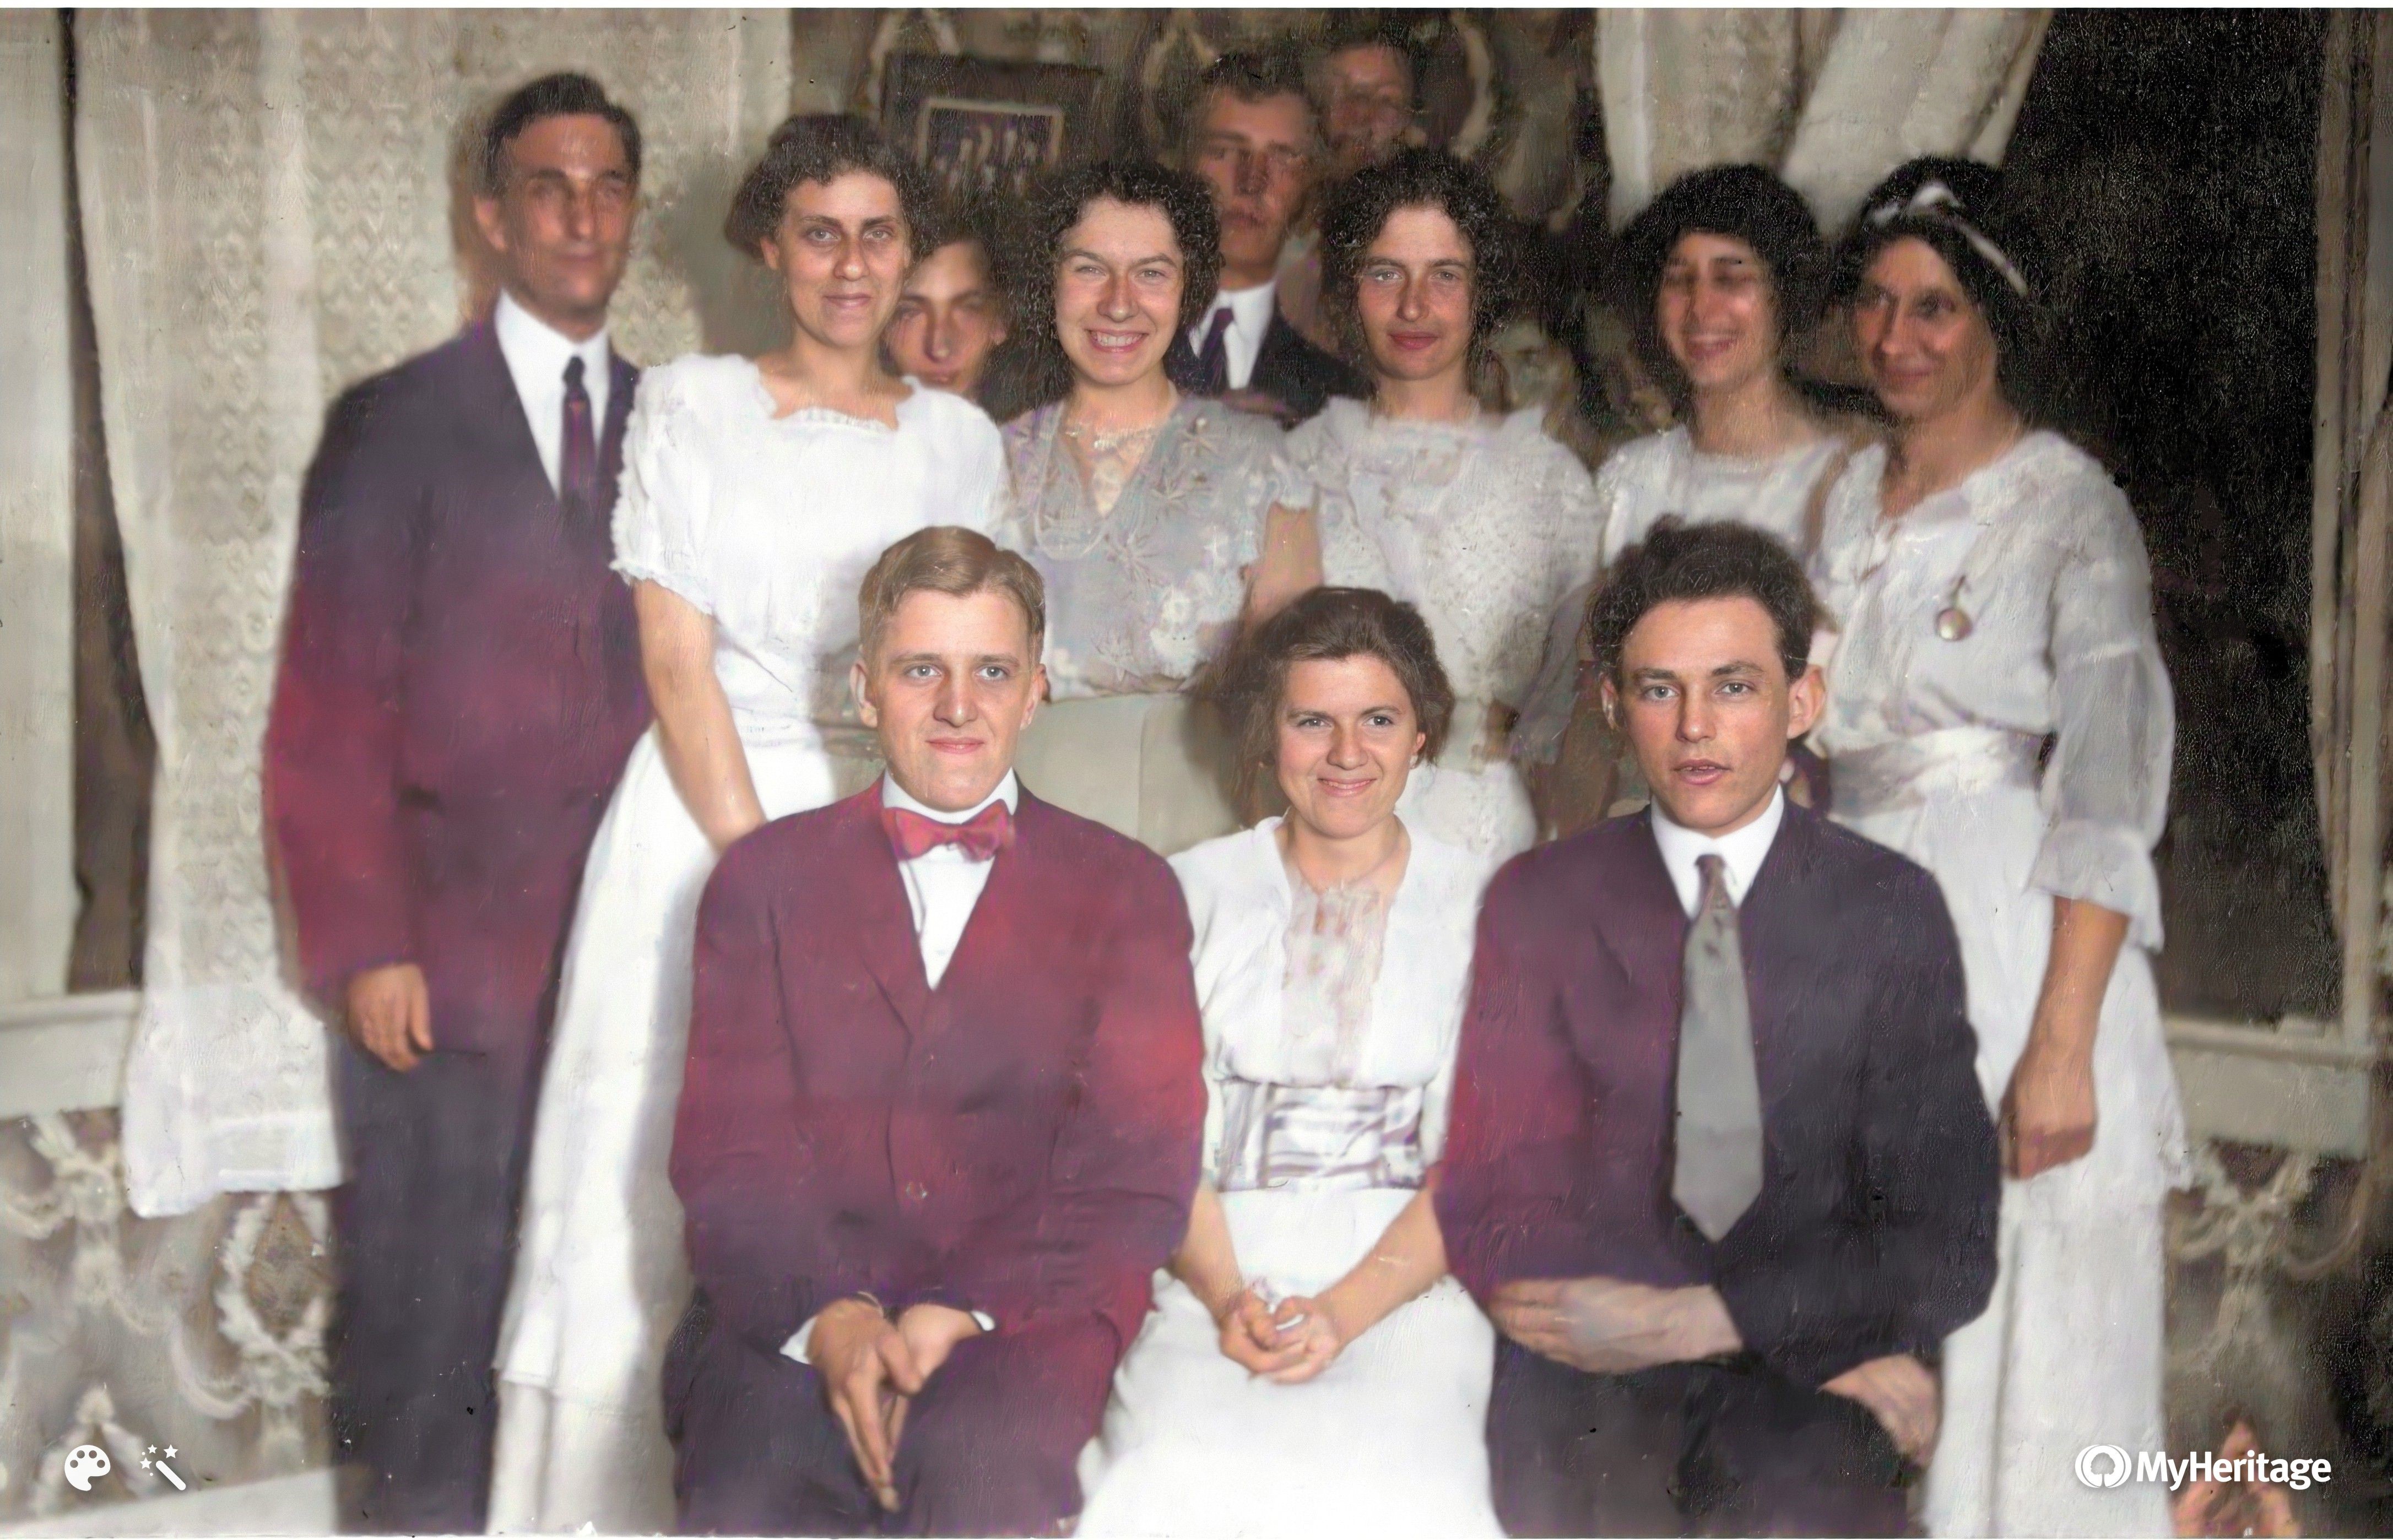
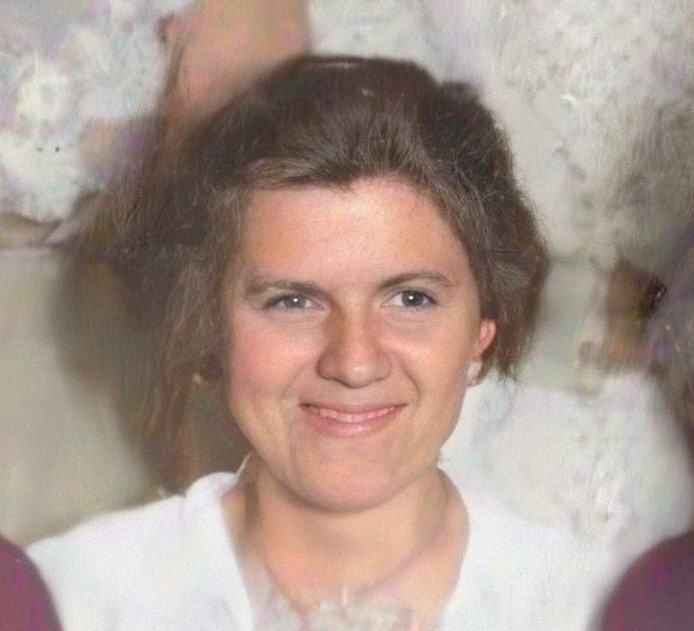
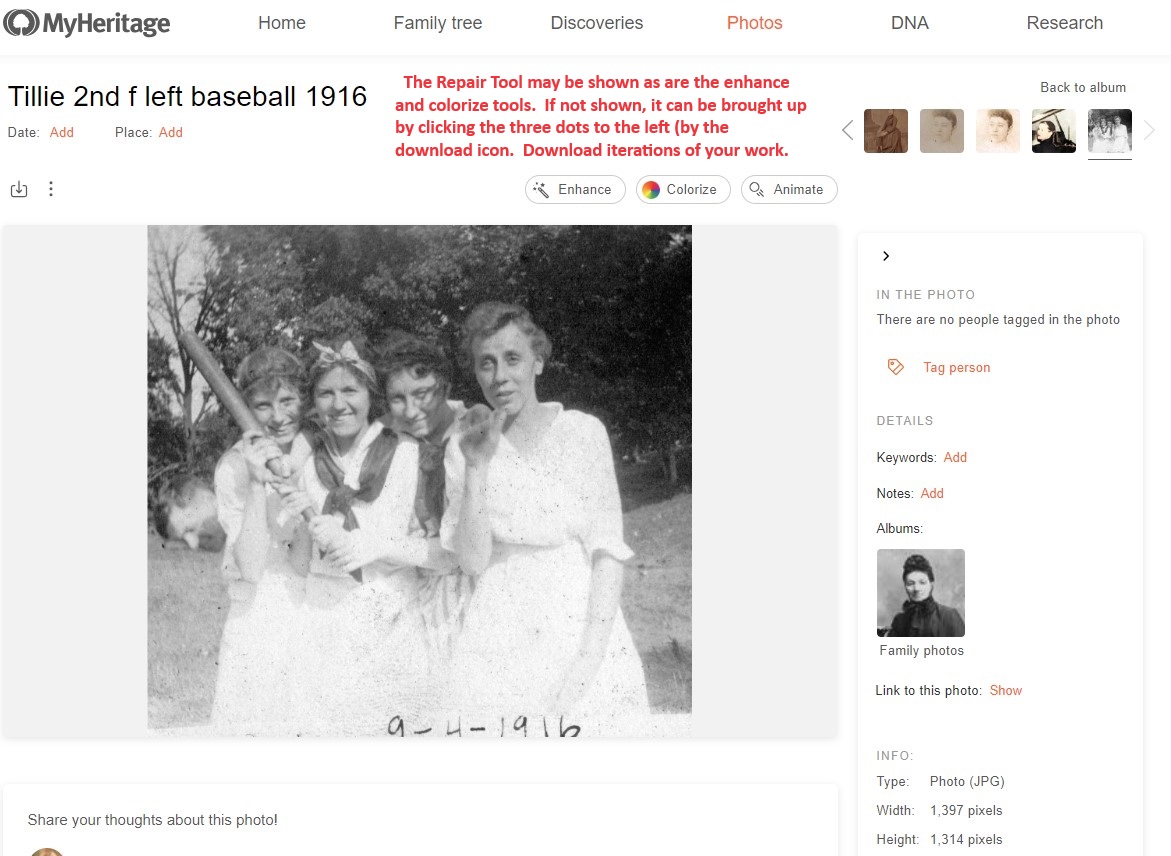
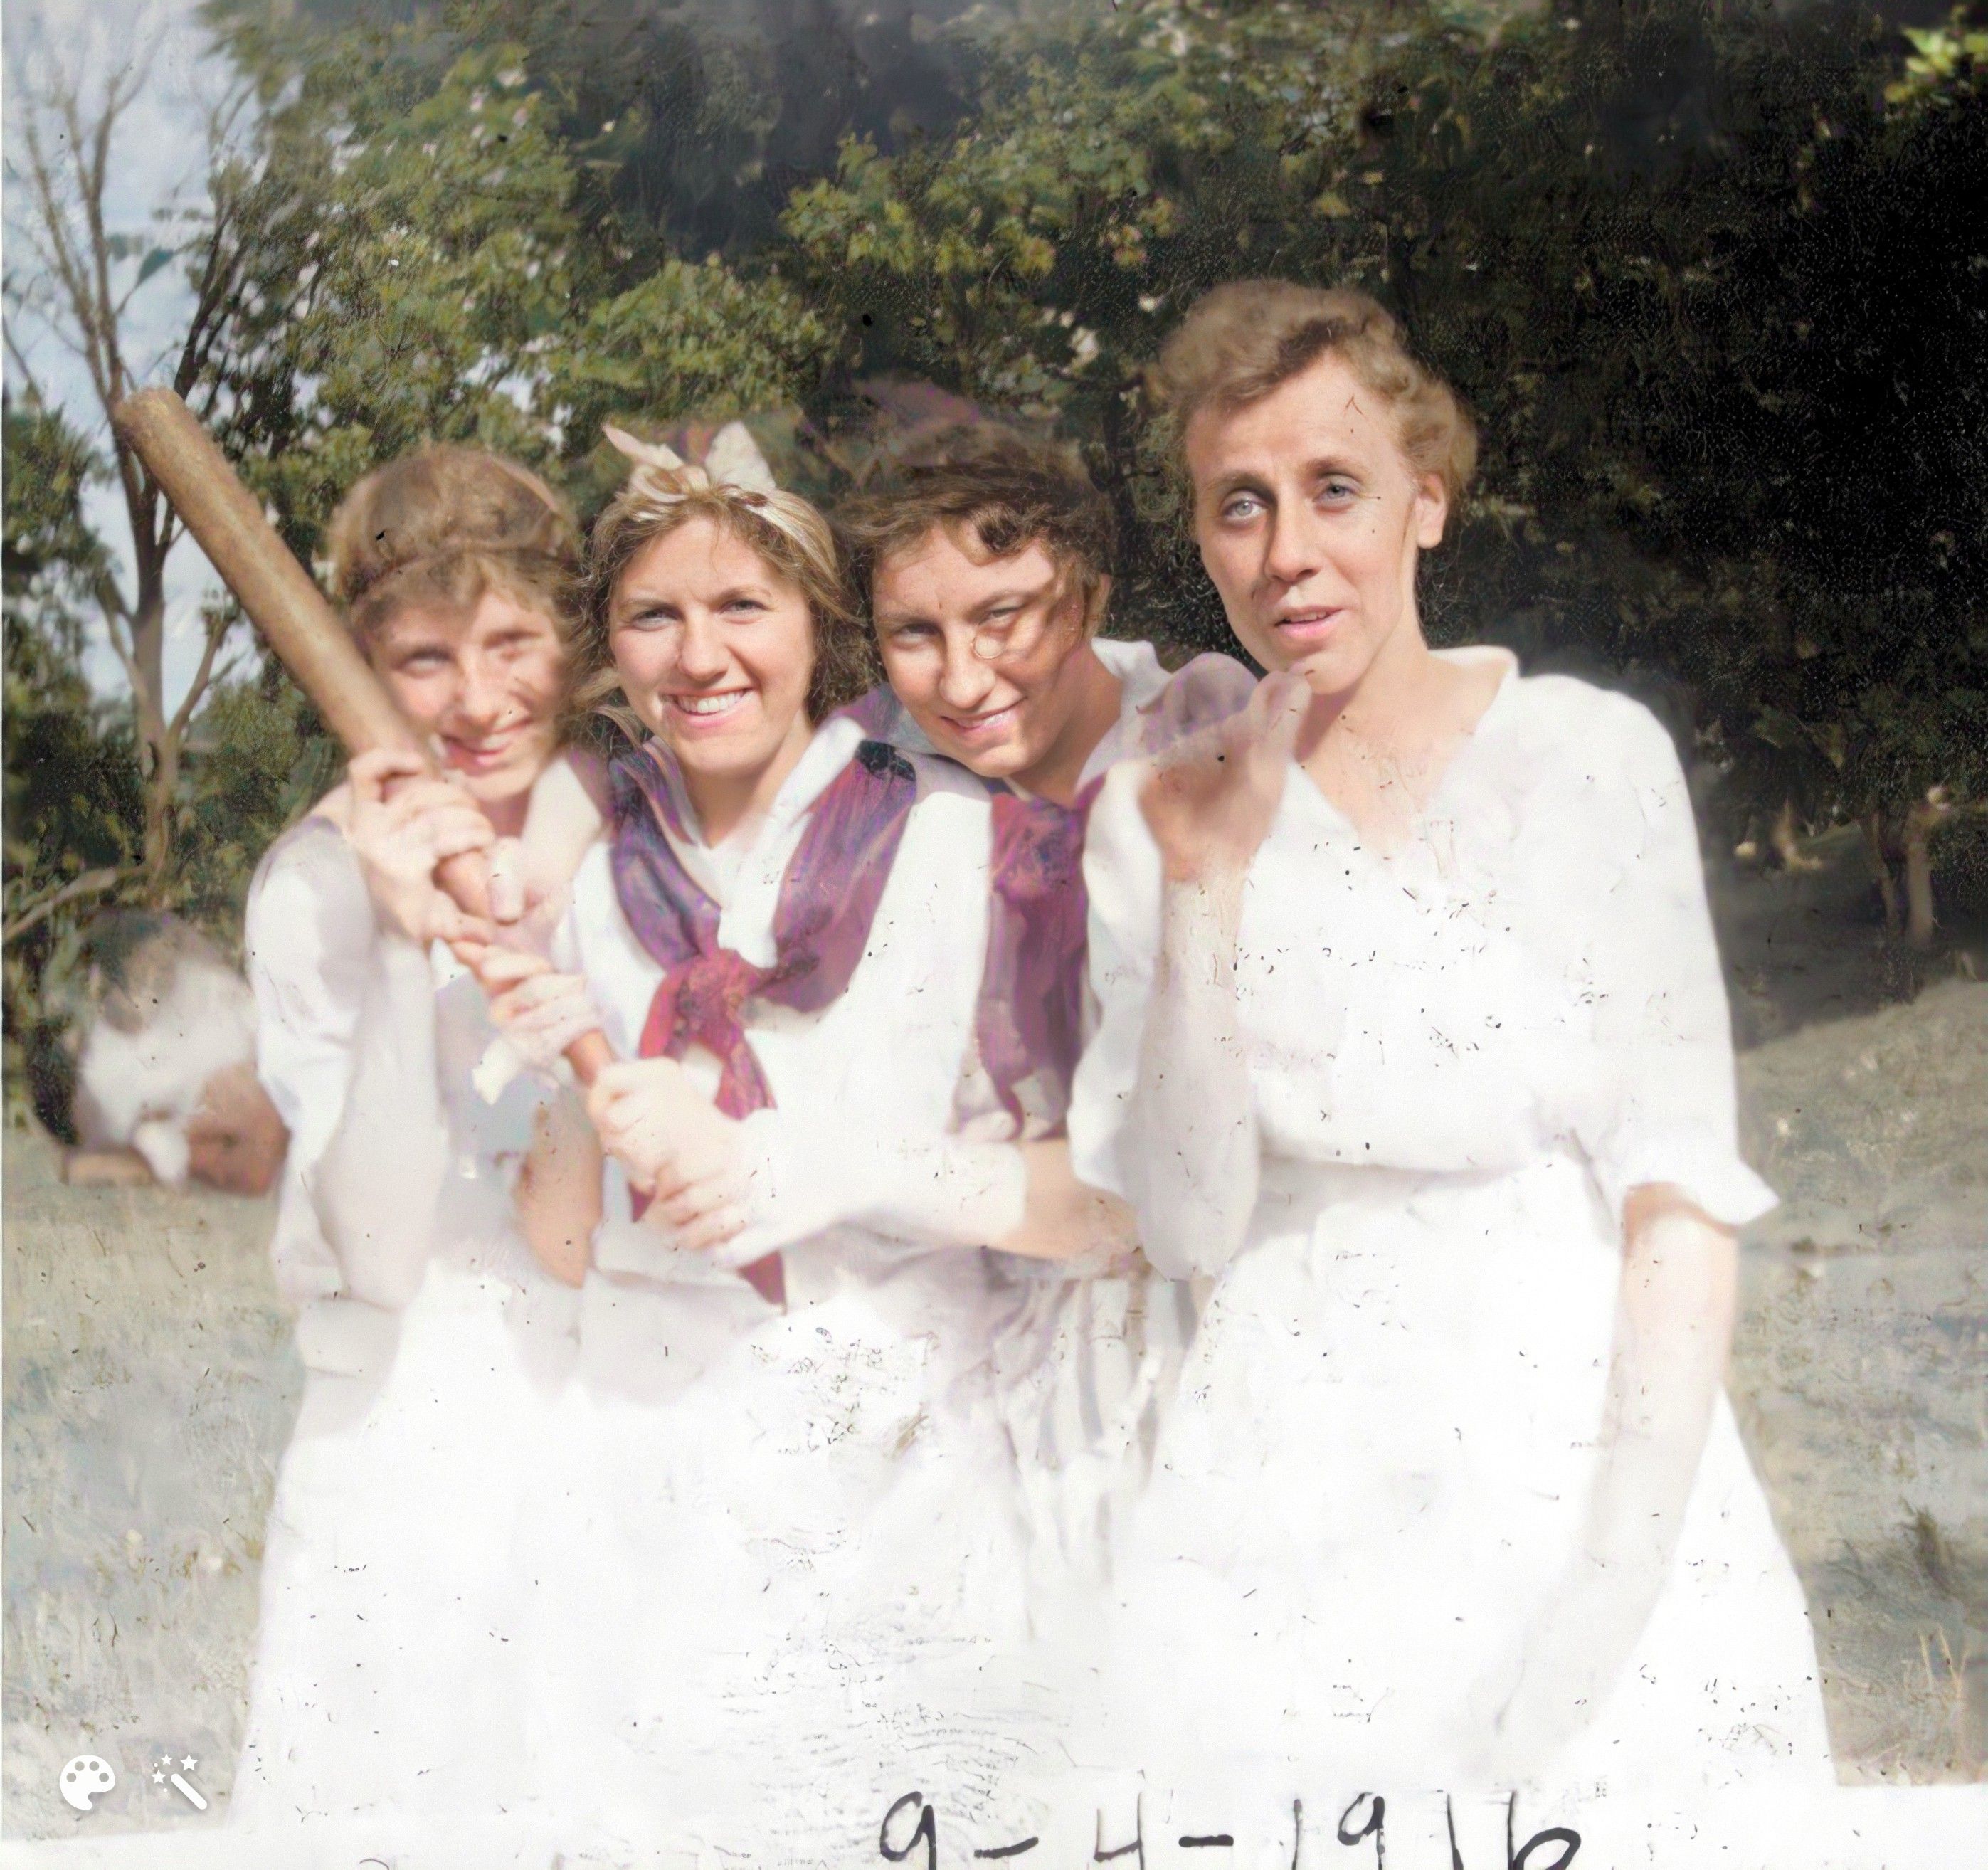
Using free tools and websites, you can often make old photos amazing. The above photo is from the Pekin Booster Club which was organized and operated until World War I. My grandmother, Matilda Heckman Veerman is in the front row. The improvements are more pronounced in the close up below.

1) Scan your photo using a resolution of at least 600 dpi. Many libraries have them for free, my Epson V39 scanner was $110 at OfficeDepot.
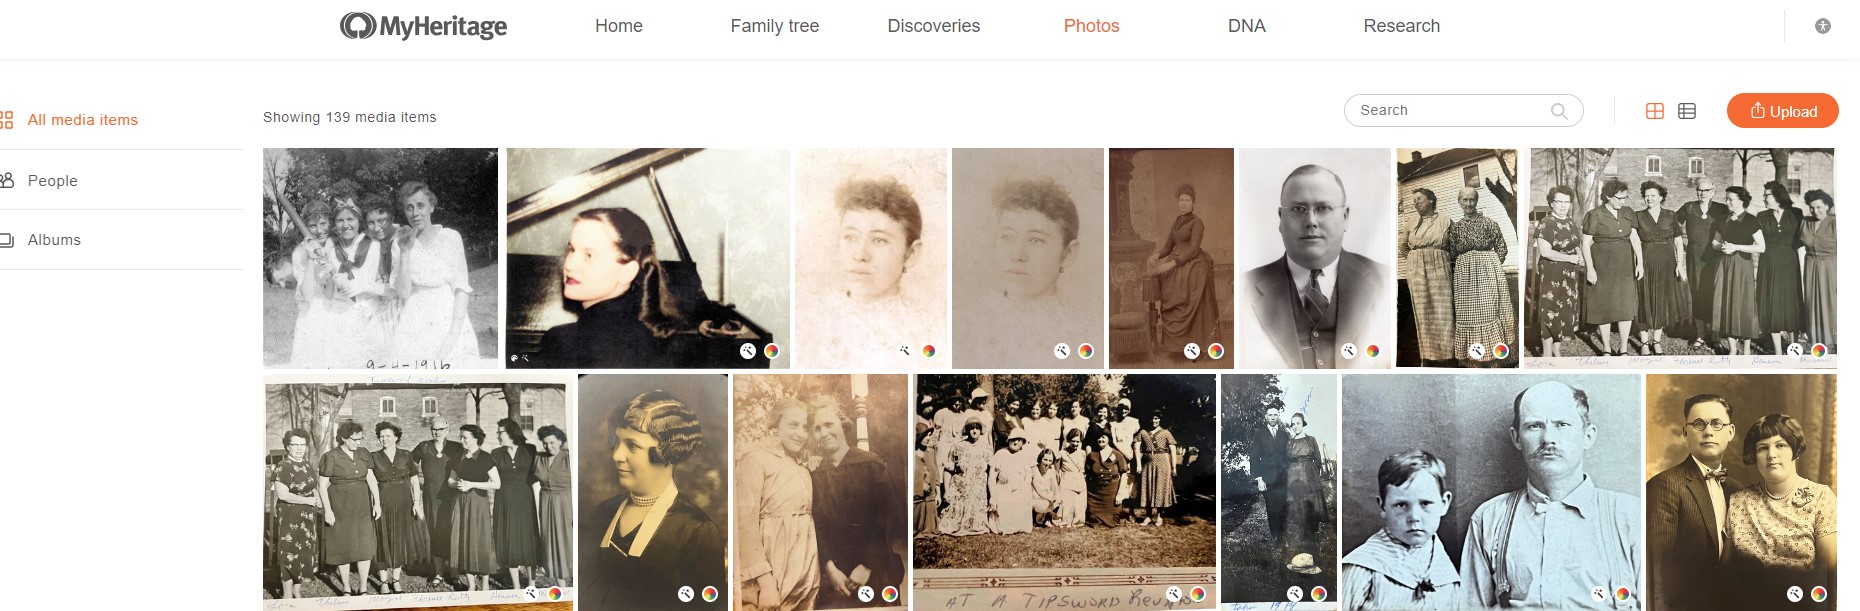
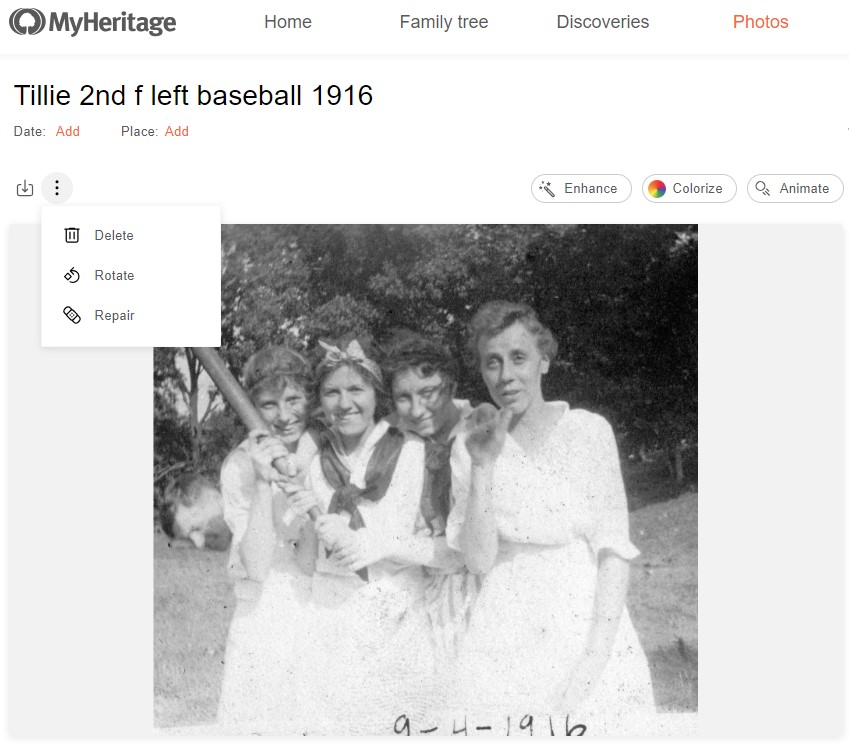
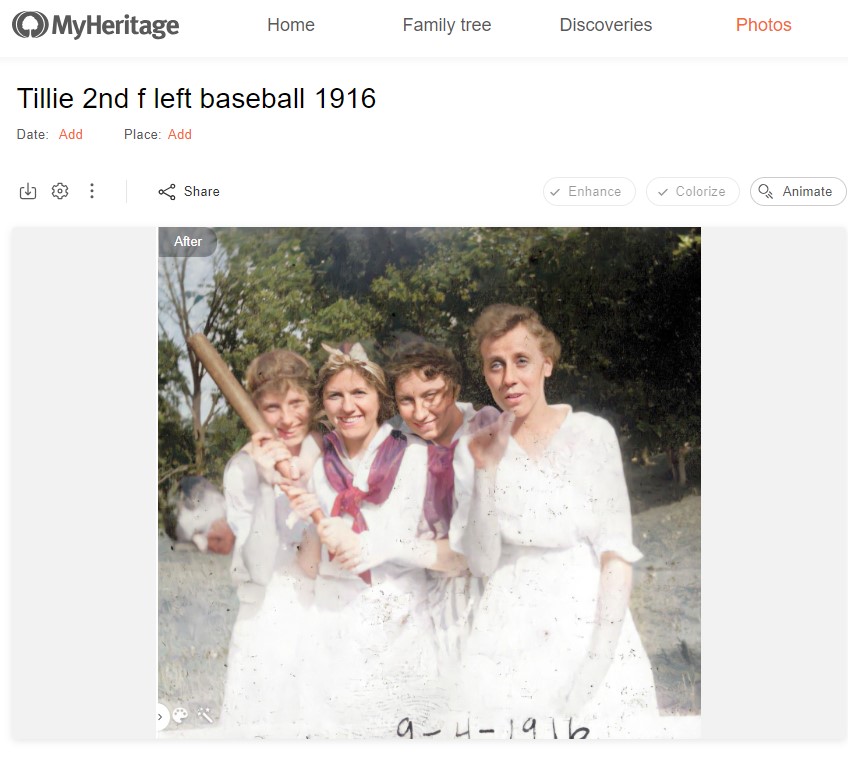
2) Set up a free account at myheritage.com. I really had to look to find the free account sign up (everything else was for “Free Trial”. An absolutely free account is available at myheritage.com. The first screen will ask you to sign up for a trial. Click on the login button and the screen will change with a link at the bottom to “Sign up for free”. Do this and create a free account to access the free photo tools. I heal major cracks using the healing brush (spot fixer) in Microsoft Photos (3), then upload the photo to myheritage.com (4) where it is repairs and enhanced and colorized. Download photos from myheritage at different stages of work. When done, if needed another final touch up with the spot fixer in Microsoft Photos.
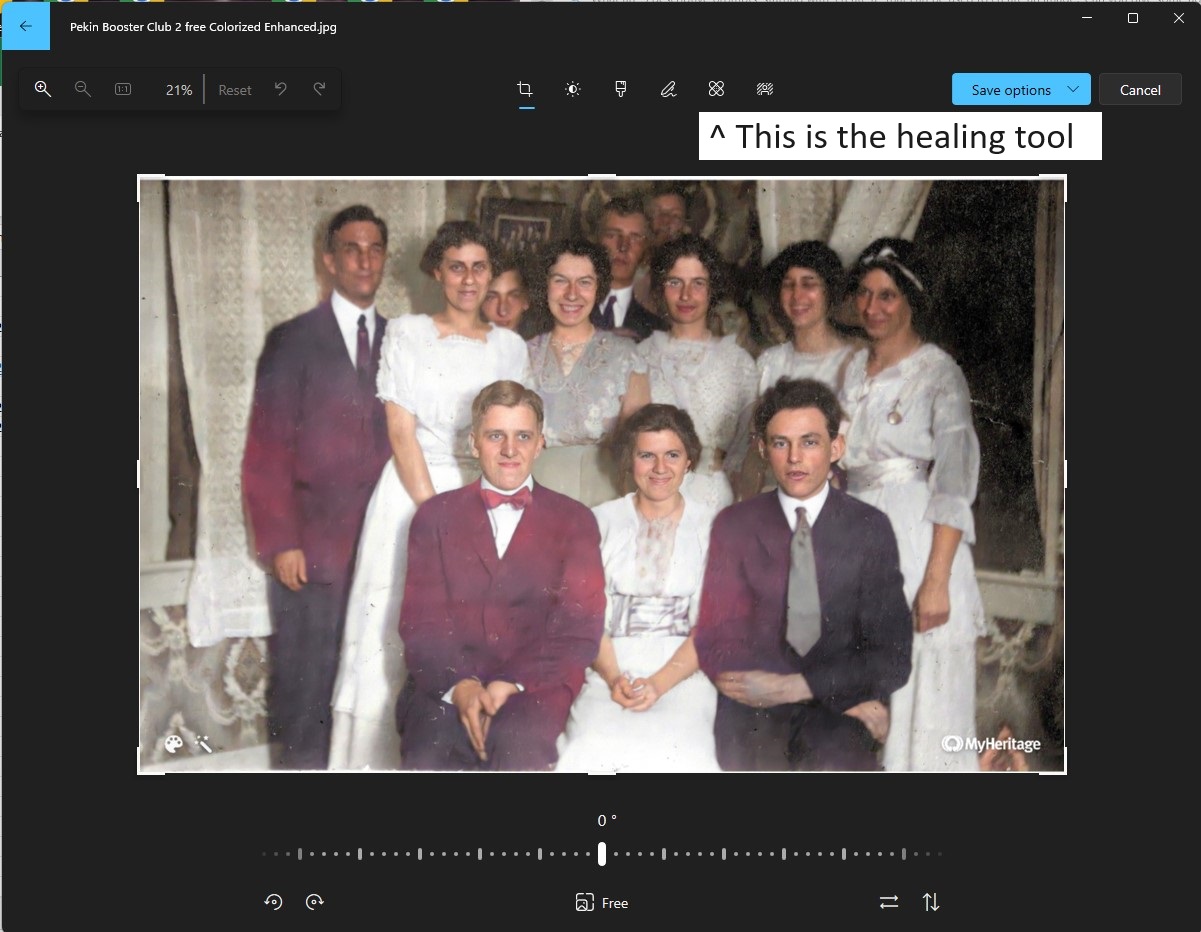
3) The best free “Healing Brush” or spot fix tool is in Microsoft Windows Photos Legacy. This is included in Windows 10 standard, but was removed from the Windows 11 in an “upgrade.” The “Upgrade” took away the healing brush which can be used to repair cracks in photos and blur out spots and replaced it with an eraser. To obtain the free “Photos Legacy” if you have Windows 11, open Photos; click on settings; Scroll down to “Photos Legacy” and click button to “Get Photos Legacy”. Let the program install.
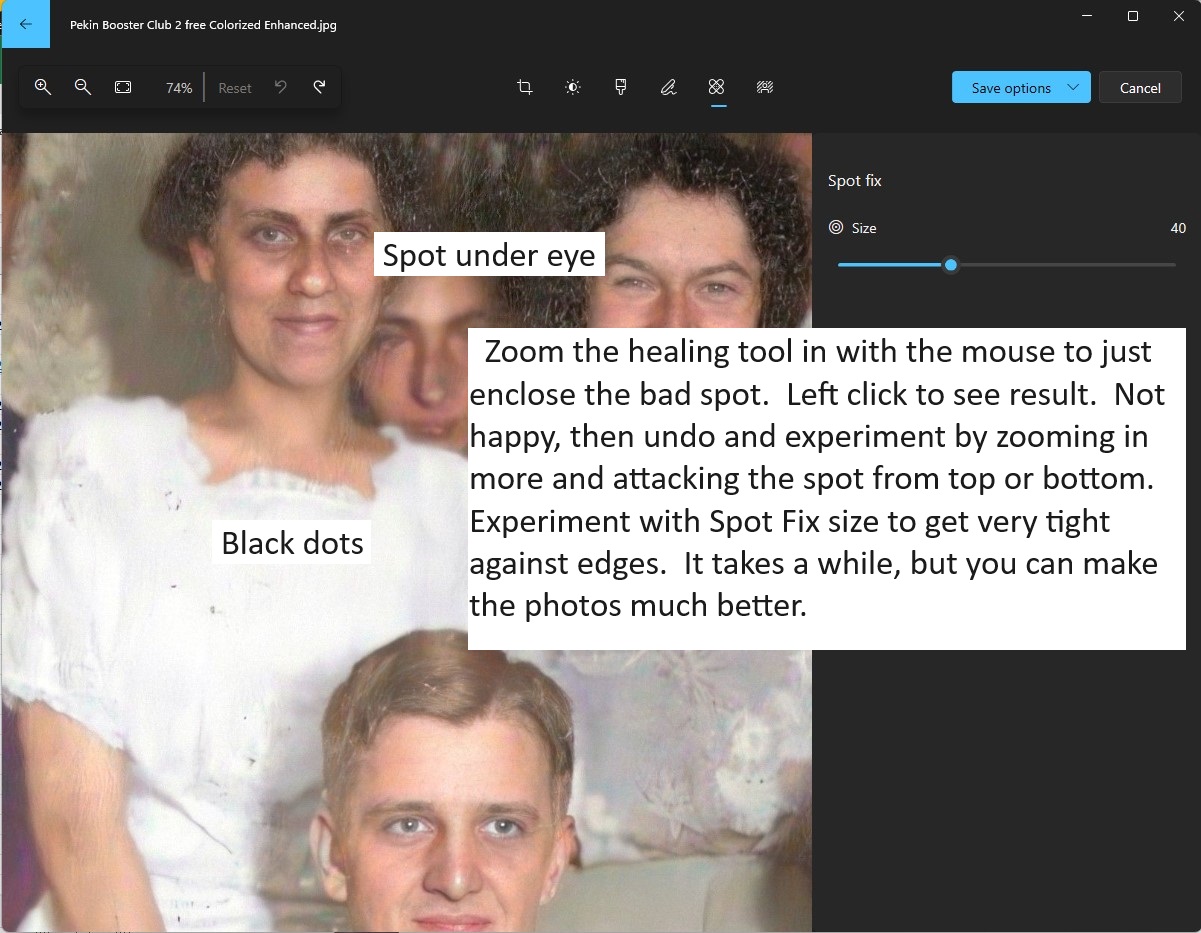
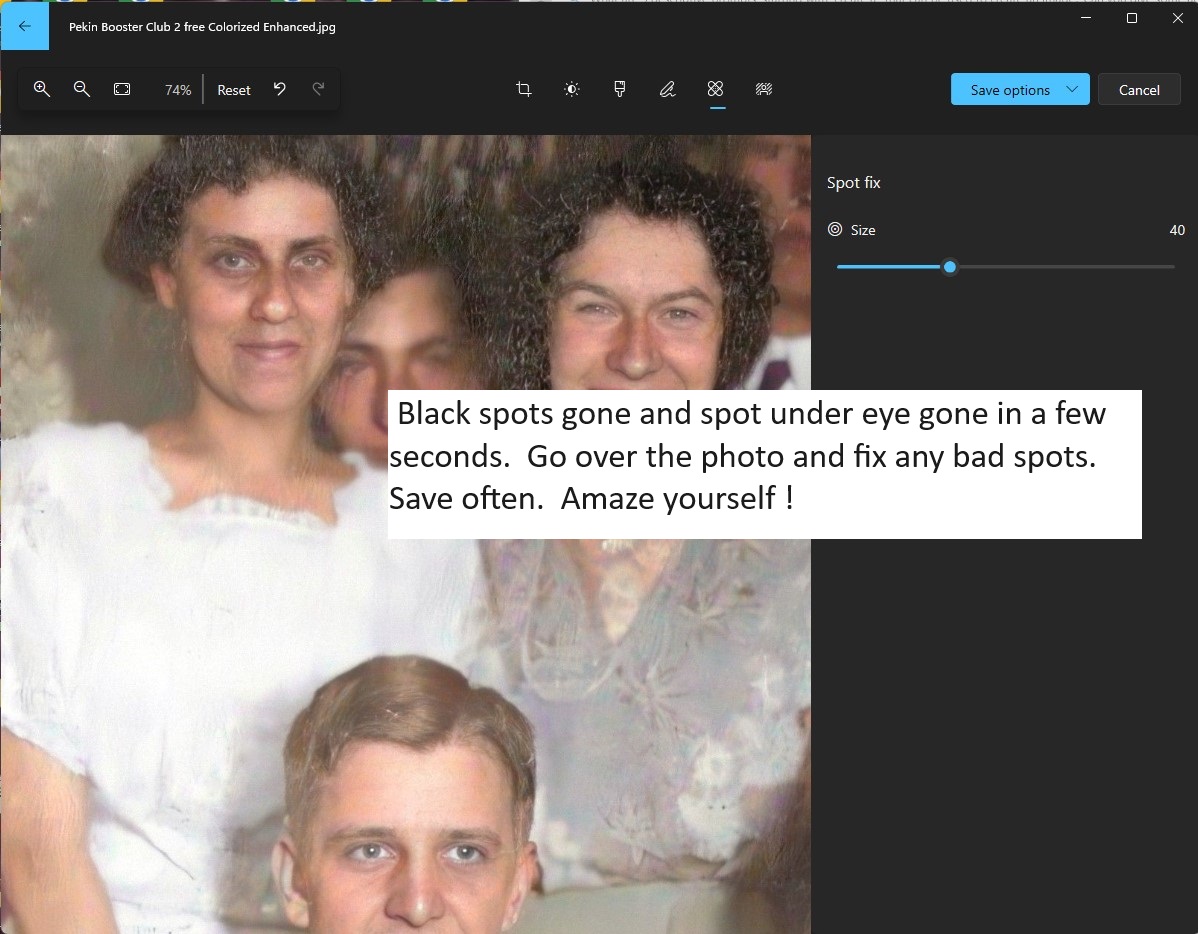
Open the “Photos” in Windows 10 or “Photos Legacy” in Win 11. Use the Healing tool (location on tab is shown in photo below right) to improve the image by zooming in to cover spots and left clicking. Experiment with circle size . Click undo to remove unwanted changes. I often make a hundred healing actions in antique photos with creases and mold, but it goes fast after some practive. This sharpen the image and remove some spots of dust or mold and cracks. Save the photo as its original name followed by an iteration letter (such as Mom and Dad b.jpg. I save my photos at different stages as photo a.jpg, photo b.jpg, etc.
4) For tough spots that cannot be blended easily (example is a wide dark line on part of the face), try opening the photo in MS Paint. Select the Natural Pencil brush. A tutorial is on YouTube here: https://www.youtube.com/watch?v=Htn5SRZlkvw&ab_channel=TT-Art. Use the color picker (eyedropper) to select a color adjacent to the damaged area. When “Painted” (Hold down your mouse button and drag over the damaged area), the pencil will blend the underlying color with the selected color. Everytime you paint the area, it will lighten the damaged area. Magnify the photo until you can see clearly how the colors are blending. It takes practice, but works great.
5) Upload the photo after spot fixing to myheritage. Click on the photo to open it in the repair shop. Repair it, enhance it and colorize it. Download after each improvement. You may find it useful to open the enhanced photo in Microsoft Photos for another touch up and then re upload to myheritage to let AI work it’s magic. Experiment, play with it.
6) The photos are not perfect, but they are stunning more often than not.
7) Also try out the “Animate” button to see what happens. Enjoy !
Bloomington Consistory Class 1944 <Click Photo to download>


The above Consistory photos are discussed in length in the Winter 2024 Gleanings.